Back during the planning stages for the 2003 Novi Toy & Hobby Expo, the need for more multi-connection modules became very obvious, as did the need for the ability to easily tweak the layout on the fly. Since it’s rarely easy to just add a corridor connection to an existing module, hallway modules are a great way to link a bunch of single-connection modules to the rest of the layout.
Of course, since unused connection points on a hallway module look a bit wasteful, I wasn’t happy with just making a bunch of 4-way corridors, but rather I made a modular hallway system that’s capable of making 4-way “+”, 3-way “T”, 2-way “L”, and 2-way “I” corridors, so that unused connections can just be removed from the central hub.
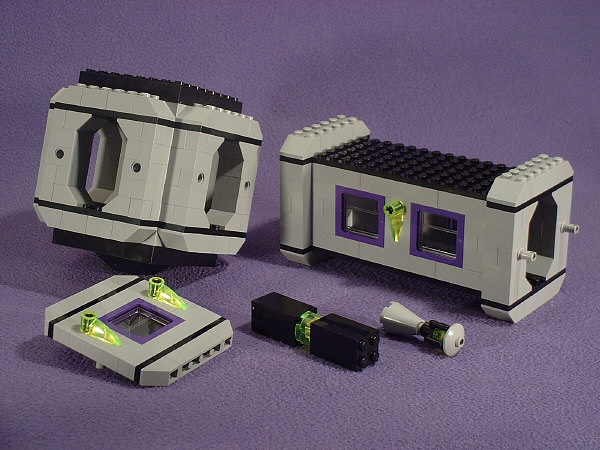
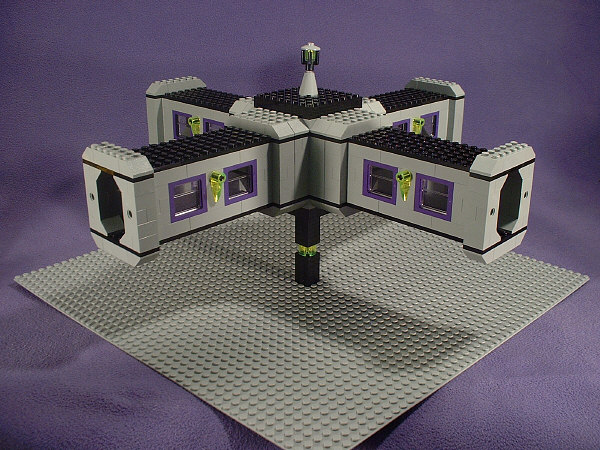
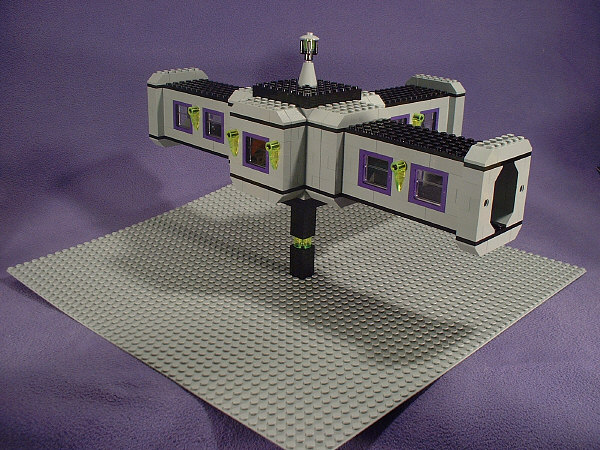
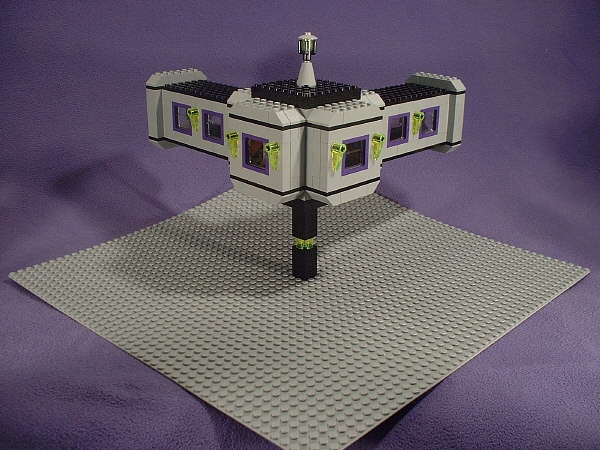
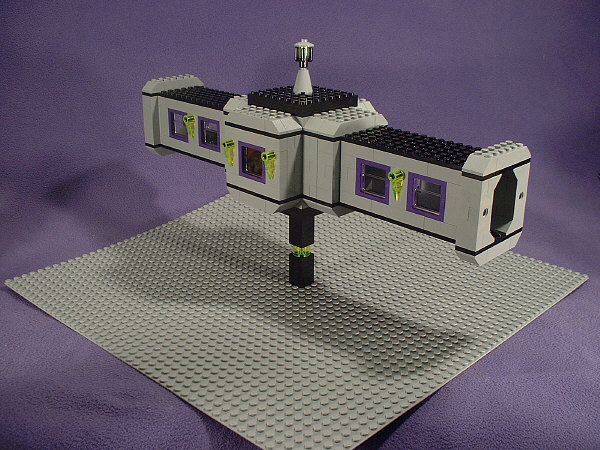
I ended up designing five different components for this system. The central hub (top left) has open ports in the standard Moonbase configuration built into all four sides and an inverse slope mount on the underside. I thought three was a good number of modules to shoot for, as it offers quite a bit of versatility, but it’s not prohibitively difficult to pull off (and I ended up buying most of the Bricklink stock on a couple of key pieces). Grey is the Moonbase default color, so most of the pieces that went into this design are grey. Black is the most common color, so all of the 8×8 bricks and 6×16 plates pretty much had to be black.
The hallway sections (top right) are symmetrical with one small exception. As per the official corridor connection standard, they have TECHNIC® pin holes on one end, but there’s no reason to waste pins in the other end, so the 1×2 TECHNIC bricks have been replaced with 1×2 bricks that have pins permanently attached to them which plug into the central hub. Since the hub sections present a pretty boring color scheme so far, I picked up some of the new dark-purple Train windows to give the aesthetics a boost, and tossed in a bunch of trans-neon green pieces to serve as exterior “lights”. (13 NUHVOK VA sets bravely gave up their eyes for this project). The maximum number of hallway sections I’d need for the three hubs was twelve, and the minimum was six (there’s not much point in using a hallway section if it only has one connection point). I didn’t want to always have extra hallway sections sitting around, so ten seemed like a good comprimise between the two extremes. Combined with the hubs, I can make 18 different 3-module combinations of +, T, L, and I-shaped corridors.
Whenever a hallway section is not plugged into one of the hub ports, something has to fill in the opening so innocent minifigs aren’t sucked out to their doom, which is what the hatch plates (bottom left) are for. These port covers are designed to blend perfectly with this corridor system, since they need to look like they’re actually part of the hub wall rather than random pieces of colored sheet-metal that have been welded on temporarily (though any extras are open for use on any remaining open ports throughout the rest of the display). They’ve got black plates at the same exact level as the interior ceiling and floor plates on the hallways and hubs, matching Train windows, and a pair of NUVHOK VA “yard-lights” on the sides. As with the hub-ward ends of the corridors, there’s no reason to tie up actual TECHNIC pins to attach these to the hub sections, so they’ve also got 1×2 bricks with pins permanently attached. Since I only have 3 hubs, and each one will never have more than two open ports, I made six of these.
While a standard 4-way corridor is fairly good at supporting itself, a modular 4-way could collapse on itself, and a modular 2-way “L” corridor will probably sag a lot, so one of three small support pillars (bottom center) is placed under each hub section. These are loosely modeled after short lighted pillars scattered across the campus where I attended college, but the “light” section is a TNG piece that matches the NUHVOK VA eyes.
Since the tops of the hubs look a little plain, I wanted something small that I could attach to them. Radars seemed like they’d be a bit redundant if all three corridor modules ended up being placed in a row, and complicated air-scrubbing systems would probably take up a lot more room than I was willing to devote to this (you’ll understand why in a bit), so while I was tracking down all of the necessary pieces, I kept coming back to ideas about what I could do to make the hub tops more interesting. The only idea that I really had to work with was that I happened to have three light-grey 2×2 cones floating around that I wanted to put to use. Eventually I had the perfect idea. Minifigs wandering across the corridor tops to perform maintenance tasks would probably want a way to see where they were walking during the lunar night, so I made three little caged lights (bottom right) that could be attached to the tops of the hubs.
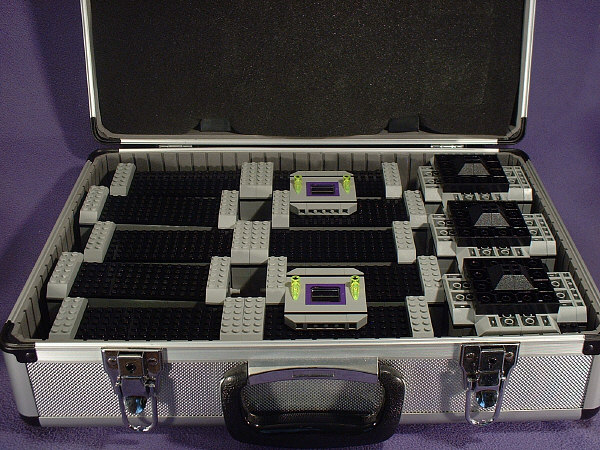
The truly neat thing about this was that I managed to figure out how to pack all 25 components (excluding the 48×48 baseplates, which can be provided by just about anyone) in a single padded suitcase, which means these are much more travel-friendly than I’d originally anticipated.
0 Comments