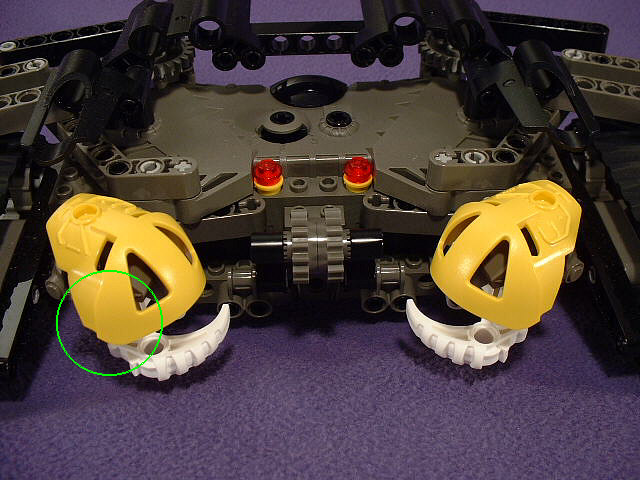
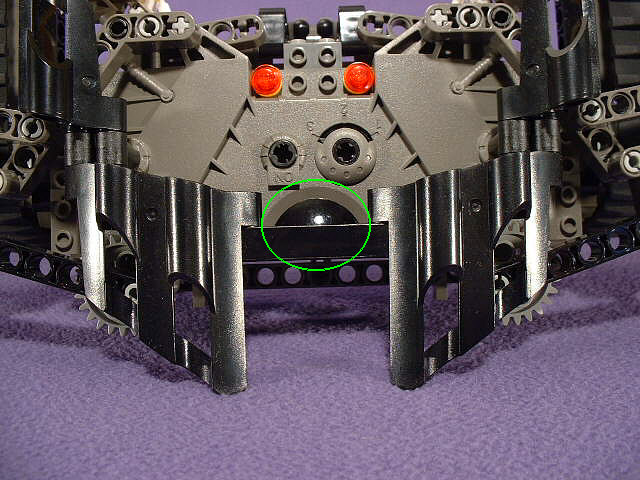
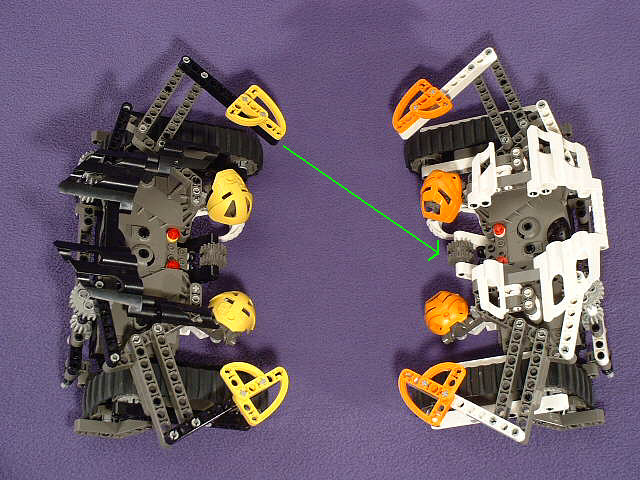
We’ll start with the yellow crab, since that’s the stronger of the two, in my experience. (If you don’t get the yellow one, the strategies later in this article will still give you a significant advantage over an opponent who does not use them) Your advantage when controlling this one is that the KOMAU has large flared sides, which make it more difficult to hook the underside with a claw and pull it off. (above left) Since my experience has been that MASKS get pulled off almost as much as they get knocked loose from the front, this can help you take a few extra hits without paying the price. The problem with this crab is that the sensor is tucked right under a support beam for the armor plating. (above right) This beam can block the IR transmissions from reaching the sensor plate on the top back of the motor block, so if your crab stops moving, you’ll probably have to reposition either yourself or your controller to get a clear line of transmission so you can get back to business.
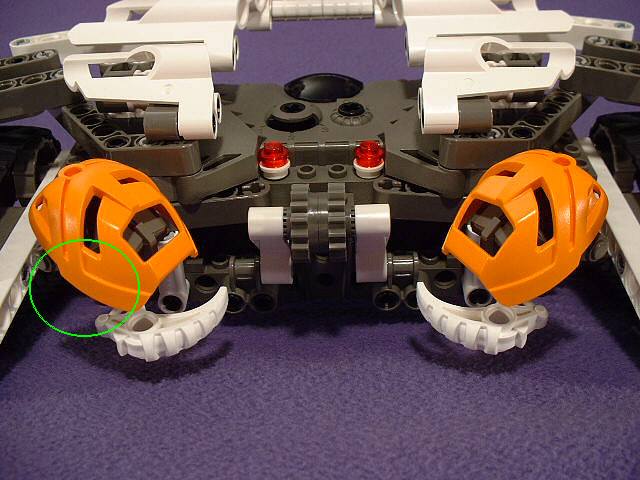
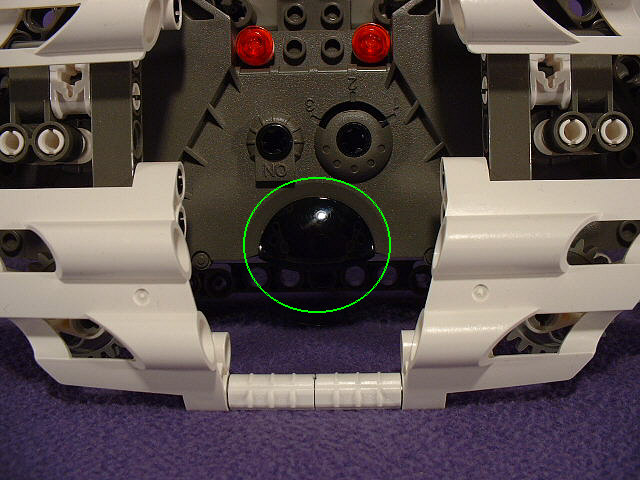
The orange counterpart has the exact opposite situation. The RURU has a more shallow build, so the sides don’t hang as low. (above left) The flared sections of the claws punch in just below this edge, which makes it not too difficult to snag the edge of the MASK and yank it free. The one small compensation is that the sensor on the orange MANAS is much more exposed (above right) and you should experience no loss of control unless you’re standing quite a few yards behind it. Since you can’t really see what’s happening in the fight from that distance, it’s not likely to ever happen with this crab.
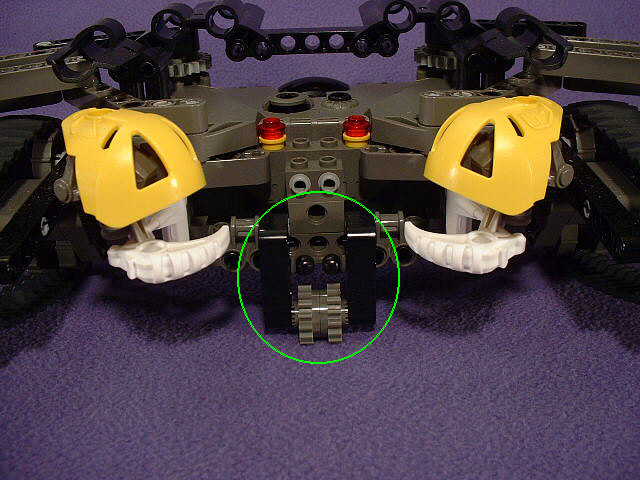
The other way to win a crab fight is to engage the liftstand (above) which will pick the treads up off the floor. When this happens you can’t move anywhere, so your opponent wins. The two ways that the liftstand can be engaged are if it is snagged by an opponent’s claws or if either of the MASK mounts are hit from just the right angle so they lever the liftstand open. One trick that might help you, depending on the judge, is that when your liftstand mechanism pops, it will only engage when you drive forward. If you keep driving in reverse it won’t actually fully disable you, though it will restrict your maneuverability quite a bit. If you have to turn while hobbled like this, do so by using reverse on one tread and not using the other tread, instead of using reverse on one and forward on the other.

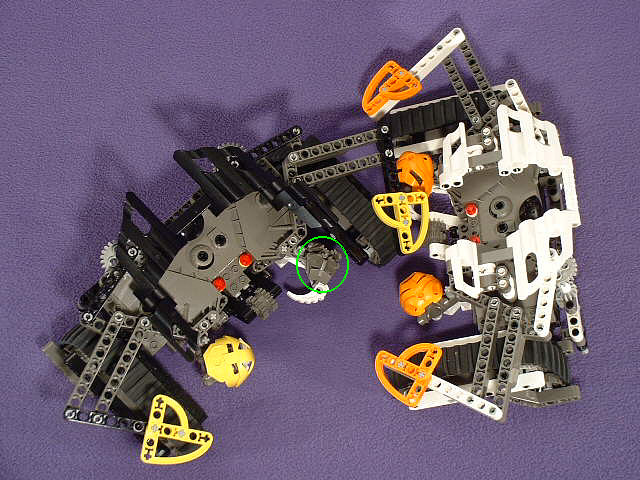
Now, for the actual strategy of a fight, we’ve got four basic steps to be concerned about. First is the approach (above far left) where you need to head straight at your opponent and get within about eight inches before making your move. Second is the attack position (above left center) where you swing one side in at an angle, as the yellow crab is doing in these pictures. To make this attack, keep pressing the forward button for the attacking claw and just let up on the other forward button until you’ve pulled into place, but don’t actually use the reverse button for the non-attacking claw. This puts your forward claw right near all the vulnerable bits of your opponent’s crab. You stand a very good chance of knocking loose the MASK directly in front of your leading claw, which would be the lower one on the orange crab in the above pictures. I also found that the claws swing in at just the right height to scrape the top of the liftstand, which is tucked right between the two MASKS. There isn’t much tension holding the liftstand in the disengaged position, so just a small bit of jostling will pop it loose. If you see it pop, back up immediately as it is entirely possible to push it back into place by going forward. Also, if you back up, an opponent who isn’t paying as much attention will probably try to surge forward on the offensive and will cause his/her own defeat as a result.
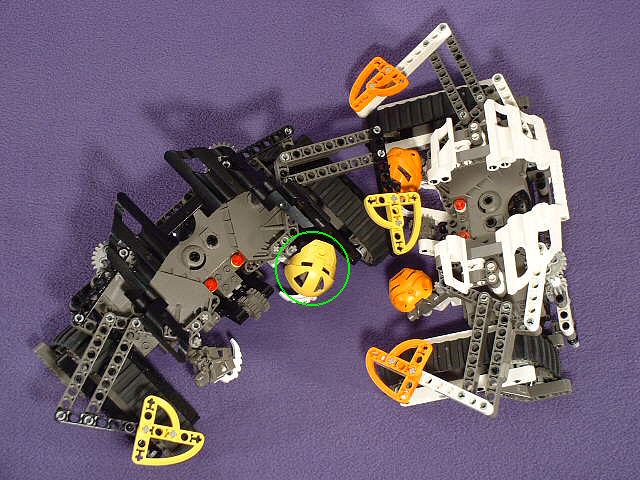
Once you’ve got the attack position down, you need to be concerned about defense. Fortunately, this attack position provides a very good defensive situation. If you’ve lost one MASK already, lead in with that side of the crab. (above left) Your opponent won’t be able to hit your remaining MASK at all and probably won’t be able to get anywhere near the actual liftstand either. There’s also very little possibility that your opponent will be able to hit the empty MASK mount from just the right angle to lever the liftstand open. If you lead in with the one remaining MASK (above right) you are setting yourself up for a quick loss. Even if both of you are missing one MASK and you can’t attack your opponent’s one MASK without exposing your own, you are much better off hoping for a little luck with your opponent’s liftstand instead of serving your one remaining MASK up for the taking.
0 Comments